Blog
Celebrating Easter and Passover

by Katie Martino Lopez
If you are a member of the allergy community, then I am sure you are familiar with the Food Allergy and Anaphylaxis Connection Team (FAACT). They are a phenomenal resource to the food allergy community, and I was honored to be asked to write a guest blog for April featuring holiday desserts for Easter and Passover. I happily accepted and got to business because I THOUGHT I knew about baking for Passover as I had done it over the years at various places I have worked but…now doing it Top 8 allergy-friendly is a whole new story.
There are quite a few rules for what is compliant for Passover cooking and baking as no leavening can be used, whether it be from any form of fermentable grain (wheat, oat, corn, barley, etc.) or from a chemical leavener (baking powder, soda). From my research and lifeline calls to my Jewish friends I got a fascinating education very quickly. I decided to keep it simple and light for the spring while making sure all the elements of the dessert are keeping with permissible ingredients.
Challenge accepted, and I came up with this Baked Apple Cinnamon Matzoh Brei. This not your Bubbe’s matzoh brei, but still really delicious and even better, Top 8+ allergy free for anyone who is celebrating Passover. As a nod to the traditional charoset at the Passover Seder, I added an apple and raisin compote to the matzoh brei for a sweet, spiced element.
I won’t say that this is exactly what a stovetop egg matzoh brei tastes like, but I think it’s pretty delicious and even better with some dairy free whipped cream. I made some sweetened whipped coconut cream for topping when it was warm out of the oven and it was gobbled up by my family!
This is a GREAT recipe for the kids to help with. They can certainly break up the matzoh, pour the milk, and measure the dried fruit. I have a plastic chef’s knife for Casey that he uses to help cut fruit and vegetables with. It is quick, easy and comforting flavors.
So, from Katie Bakes for Casey, be well and safe, and I wish my friends that celebrate a Happy Passover and remember life is short so eat dessert first…safely! Enjoy the Passover and Easter recipes!
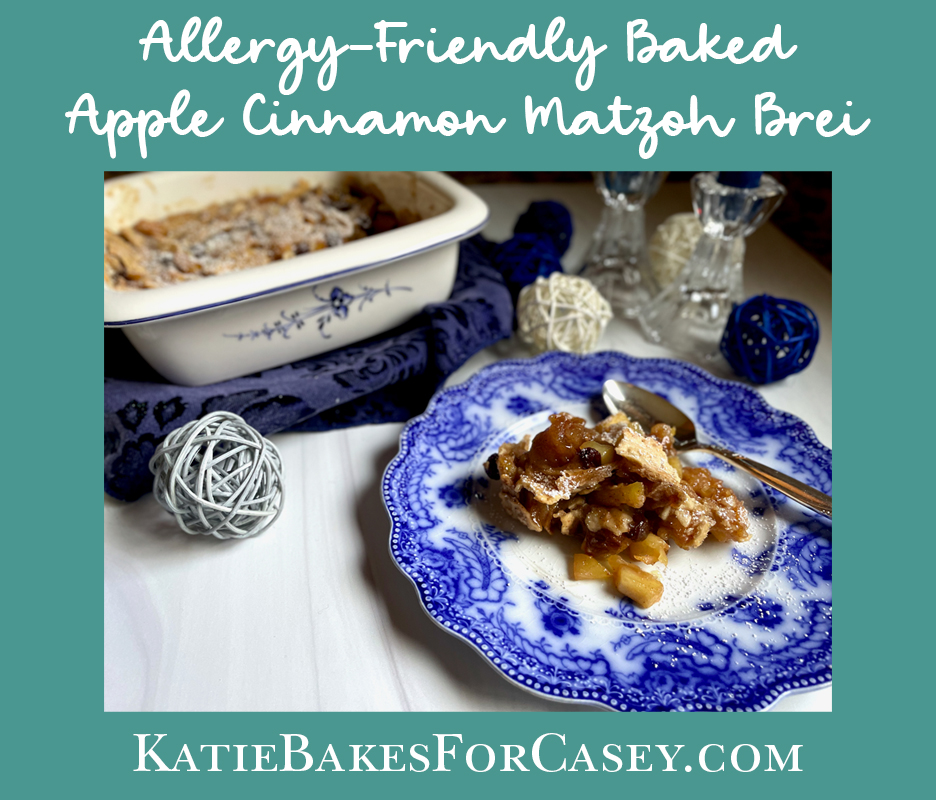
Allergy-Friendly Baked Apple Cinnamon Matzoh Brei
Free-from Dairy, Egg, Nuts, Seeds, Gluten, Top 8 Allergen-Free, Vegan, Vegetarian
Prep Time: 30 minutes
Cook Time: 35-40 minutes
Total Time: About 1 hour 15 minutes
Yield: One 8” square baking pan, about 4-6 servings
Ingredients:
Apple Raisin Compote
- 1 ½ Tbls. safe butter for sautéing
- 1 ½ c. peeled and chopped firm apples, about 2 medium
- 2 Tbls. granulated sugar
- ¼ c. raisins or any other dried fruit you like (can add more, but it will make the matzoh brei sweeter)
- 1 tsp. cinnamon
- 2 Tbls. orange juice
- Very small pinch of salt
Matzoh Brei
-
5 sheets matzoh
-
1 1/3 c. non-dairy milk of choice (if using regular milk is not an issue, feel free to use)
-
3-4 Tbls. sugar for topping
Ingredients and Substitutions:
Matzoh – I used a gluten free matzoh when testing this (and boy did I test this over and over and over!) because it’s compliant for Passover dietary law AND seed and nut free. Many Passover desserts are made with nut flours and eggs and that is obviously out to keep it Top 8 free. A lot of seeds (ex. sesame) are not allowed at Passover, so it was nice not to worry about that for a change. Please be aware that some matzoh does contain egg so read your labels and do your research for a safe product.
Safe milk – To soak the matzoh I used Casey’s safe So Delicious coconut milk but feel free to use whatever non-dairy milk is safe for you. If you are making this and dairy is not a concern for whatever reason, feel free to use.
Raisins – I used raisins in the apple compote but feel free to add dates, dried cranberries, figs, currants, or whatever appeals to you. I made it as a nod to charoset, which is served at the Passover table. From talking to friends and doing research it varies in texture from a chutney style. It also traditionally has walnuts but being a Top 8 free recipe that had to be left out, but of course you can add it.
**As always, please check which brands are safe for your needs.**
Method:
-
Prepare the apple filling: In a large sauté pan, melt the safe butter over medium high heat. Add the chopped apples and 2 Tbls. sugar and continue to cook over a medium flame, stirring often, until apples are softened but not mush. The sugar will help draw the moisture out and make a nice caramelization.
-
Add orange juice and raisins and cook until juice is evaporated. Place in a small bowl and stir in cinnamon and salt. Set aside. NOTE: Apple filling can be cooked up to a one day ahead and kept in the refrigerator. Warm gently (or at least have at room temperature) before adding into the matzoh brei.
-
Preheat oven to 350°.
-
In an 8×8” square pan, break up the matzoh sheets into smallish pieces. Pour the non-dairy milk over the matzoh, pressing in to let it soak, and let it sit for about 10 minutes. Stir and press down often to ensure the matzoh is absorbing the milk. It will break down and the starch released will help bind the mixture as it bakes.
-
Stir the apple mixture in evenly and generously sprinkle the 3-4 Tbls. sugar over the top to help make a nice crust in the oven.
-
Bake 35-40 minutes or until browned on top.
-
Serve warm with powdered sugar (corn free if keeping it compliant for Passover) or non-dairy whipped topping.
-
Matzoh brei will keep 2 days in the refrigerator but reheat before serving for best flavor and texture.
Recipe Notes:
- I used a medium sweet Rome apple for this recipe, if using a tart apple like Granny Smith then the sugar amount will have to be increased.
- Use a large sauté pan to make the apples as it will help the fruit and sugar caramelize and deepen the flavor. If it’s crowded in a small pan the texture will be compromised.
- Whatever matzoh you use please do research to make sure there is no cross contamination for other food allergies you manage. Note that a lot of matzoh are made with eggs.
Celebrating Easter
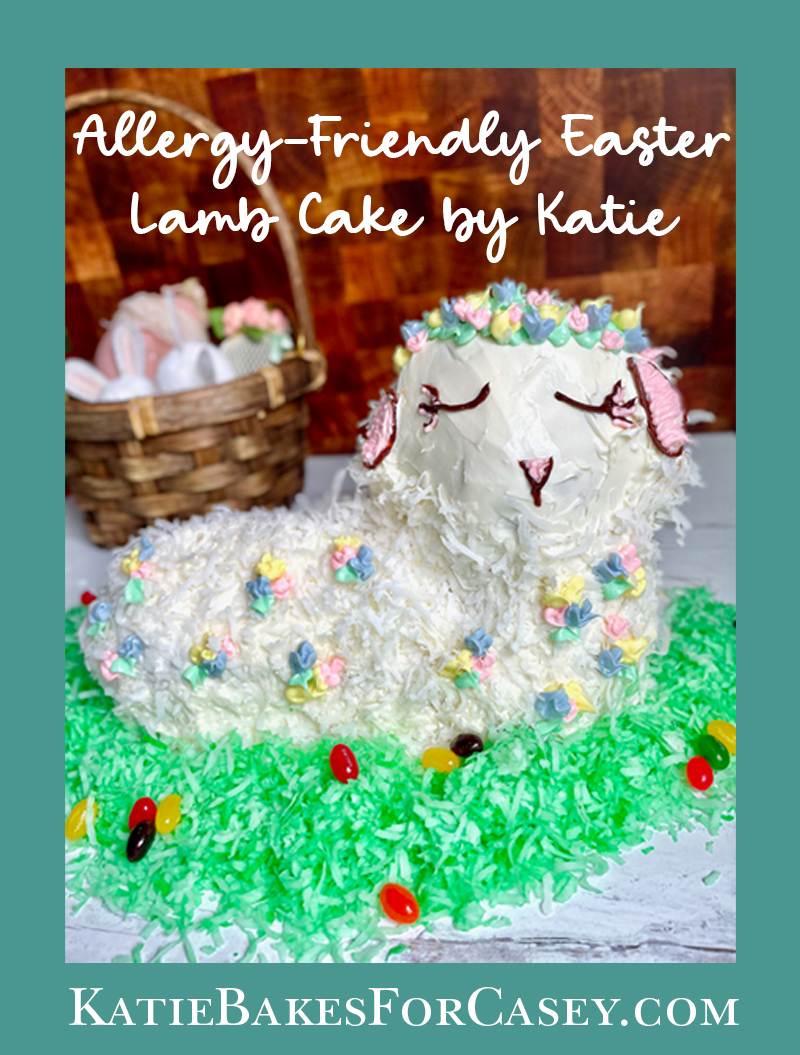
Growing up, Easter was a major, few days of celebration in the Martino family. As I have written 1,000 times before, my family is traditional Italian and from Holy Thursday through Good Friday our kitchen was constantly going with preparing the traditional pizza rustica, Torta di Grana, homemade pasta for cannelloni and more. My favorite part though was my Aunt Filomena’s lamb cake. I have an unholy love for cake, and this was everything you could ask for-moist yellow cake baked in a decades old lamb cake mold, fluffy marshmallow-y icing, and rich coconut flakes. She scattered jellybeans to look like Easter eggs around the green tinted coconut “grass”. I stared at the cake on the dining room sideboard from the minute Aunt Fannie walked in with it from the minute it hit the table for dessert. Heaven!
This is one of my childhood traditions that I had to recreate for the Wolf Pack. It honestly is incredibly easy, the only thing you need is a 3D lamb mold (available on Amazon, of course!) or you can make it flat and trace a lamb template by baking the cake in a sheet pan. The pan MUST be greased very well, or it will get stuck in the grooves when unmolding. It is also best to refrigerate it overnight.
I have two cake options, one Wacky cake that is egg and dairy free and another that is not egg-free, but of course both are always customizable to your safe needs. You can use my Top 8+ free icing but go right ahead and use your favorite recipe or store-bought tub frosting. No worries! Do what’s easy and what your family loves; that’s what it’s all about.
Be safe and well and enjoy the Spring holidays, this year feels hopeful and bright after a dark year. Happy Easter!
Allergy-Friendly Easter Lamb Cake
Free-from Dairy, Egg, Nuts, Sees, Gluten, Top 8 Allergy-Free, Vegan
Prep Time: Cake: 10 minutes, Icing: 15 minutes
Cook Time: Depression Cake: 30 minutes, Perfect Yellow Cake: 40 minutes to start.
Total Time: Without cake cooling and refrigerating, about 2 hours
Yield: About 12 servings if using mold
Ingredients:
For Perfect Yellow Cake (gluten-free or regular)
For Vegan Wacky Depression Cake (gluten-free or regular), follow variation for vanilla or chocolate: Gluten-Free Vegan Depression Cake
For Allergy-Friendly “Buttercream” Icing
See Instructions for Baking in the 3D Lamb Mold Below in “Method”
About 1 ½ – 2 c. plain sweetened shredded coconut for the lamb’s “wool”
For Tinted Coconut “Grass”:
- 1 – 1 ½ c. sweetened coconut flakes
- 3-4 drops green food color
- Add coconut to a large zip top bag.
- Dilute a few drops of green color with about ½ tsp. water.
- Start with a small amount!! You can always add more coloring but can’t make it less. The color will be more intense with the more water you add.
- Shake the bag vigorously to color the coconut and set aside.
Method:
Baking in the 3D Lamb Mold
-
Preheat oven to 350 degrees.
-
Prepare the mold by brushing it entirely on both sides with safe shortening and dust heavily with safe flour, knocking out the extra. Make sure all the crevices are thoroughly covered in shortening and flour or it will stick. Butter and safe butter will not work as well, and coconut oil will melt very quickly.
-
Pour the batter into the bottom half of the mold, making sure it doesn’t overflow. Add the top half of the mold and close shut with string or a twist tie in the open loop.
-
Gently place in the middle of the middle rack of the oven. Put a piece of foil or a sheet pan underneath to catch any overflow.
-
Bake 30-40 minutes, testing the cake for doneness with a toothpick or thin skewer through the open circle in the mold. COOL COMPLETELY on a wire rack with the top of the mold off.
-
When cool, wrap and chill the cake a few hours or even better overnight to set the structure and make it more stable to work with.
-
***If not using a mold*** - Prepare your cake base, but bake in a half size sheet pan. You want it to be a tall cake as it’s difficult to cut in half, and it’s sweet enough with just the outside layer of icing. Cool and refrigerate the cake as in the directions above.
-
Print a lamb template offline and use to cut out the lamb shape for decoration.
Prepare the “Buttercream” Icing:
-
Using the recipes above or using your favorite icing recipe (or have tub frosting ready), prepare the icing for decoration. This can be made a day or two ahead or even a month ahead of time and frozen. It is a very stable icing. If prepared ahead and refrigerated, put it back on the mixer and beat until fluffy and spreadable. This is VERY important, so it will not tear your cake. If the cake is refrigerated as suggested, this will minimize the cake tearing as well.
For Cake Assembly:
Have ready:
- serving platter
- plain coconut
- tinted coconut
- prepared icing
- food coloring for tinting
- pastry bags for decoration
- long wooden skewers or dowels for lamb head support
- jellybeans and/or other safe candy decorations
Cake Assembly:
-
On your serving platter (you DO NOT want to move the cake once it’s decorated!) put a thin strip of buttercream the same length as the lamb base. This will help anchor it down.
-
Remove the cake from the refrigerator and cover the whole lamb with icing, not too thick but enough not to be see through.
-
Place the uncolored coconut on a plate and holding the iced lamb (this can get messy!) with one hand, use the other to pat all over the lamb, front and back, leaving the face and front of the ears uncovered.
-
Place the lamb upright on the strip of icing on the base. NOTE! If the lamb’s head gets heavy or cracks, push a long skewer or dowel straight down from the top of the head to keep it stabilized. Cover the hole with icing and coconut.
-
Decorate the lamb’s face and ears and body as you wish, either using my picture as template, examples online, or your imagination!
-
Scatter the green coconut “grass” around the lamb’s base and add the jellybeans and other candy décor you wish.
-
Refrigerate for the icing to harden and set the lamb’s structure. Let sit out 15-30 minutes before serving.
-
If using a flat cake template – Follow all the same directions just put the cake on a flat serving base. You’ll have to do more freehand decoration without the mold leaving a guide for you. You’ll also need less coconut “grass”.
-
The cake will keep for 5 days refrigerated, and the uniced cake base and buttercream can be frozen for up to one month as well.
Recipe Notes:
-
It’s a major benefit to have the cake refrigerated after cooling! It will be much more stable and easier to decorate.
-
Have an idea of how you want to decorate the cake before you go into it, so you’ll know how much icing, coconut, and décor you’ll need.
-
The colors I suggested are merely that-suggestions! Let your imagination go and have fun with this.
To follow Katie and her delicious, allergen-friendly recipes, visit her site at: KatieBakesForCasey.com.